
APPLIES TO: Admins
Last updated: June 17, 2026
Overview
On the event landing page for your camp or clinic, you can enable check-in mode for a cleaner way to check clients in, review/edit their registration responses, and manage client payments.
Step-By-Step Guide:
- Log in to your account, hover over the navigation bar on the left, and click Events
- From your event list, find your desired camp or clinic and view the landing page for it
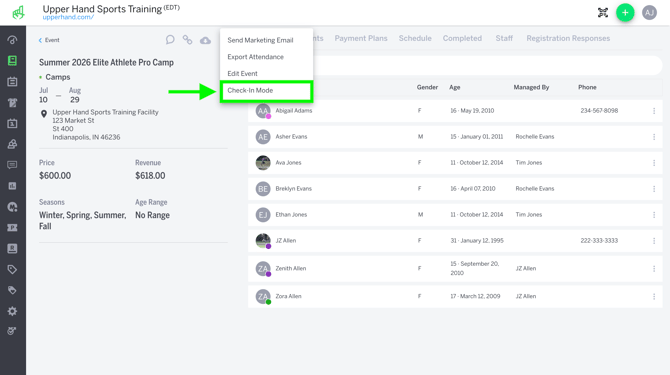
- Once you're on the landing page, click the three dots to the right of the registration export cloud
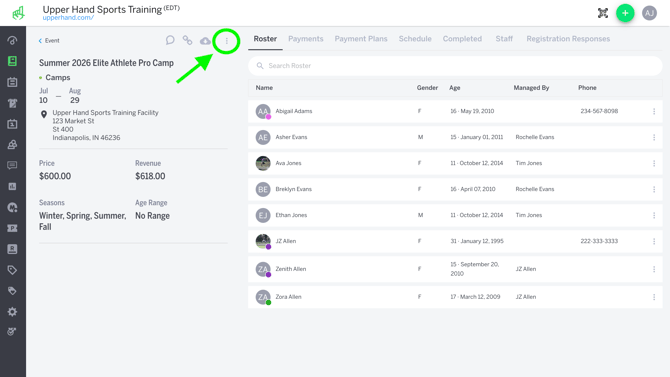
- From the populated menu select Check-In Mode
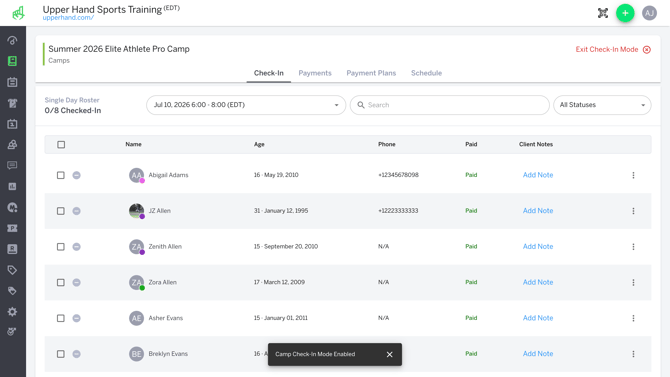
- Once you are in Check-In Mode, you will see 4 tabs:
- Check-In - This is your daily attendee roster with check-in capabilities
- Payments - Manage the individual payments associated with your camp or clinic
- Payment Plans - Manage payment plans associated with your camp or clinic
- Schedule - See all sessions (past and present) of your camp or clinic
Check-In Tab Overview
Check-in All Attendees
-
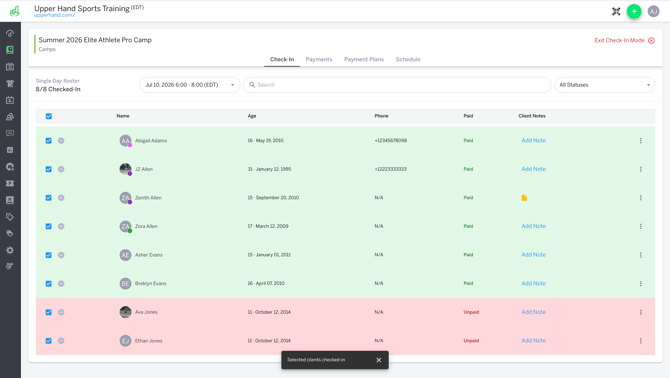
The Check-In tab lists all of your camp attendees. It is auto-filtered by date so you can see who is coming to your camp by each individual day. You will see your total attendees and how many of them are checked-in via the Single Day Roster count to the left of the date filter.
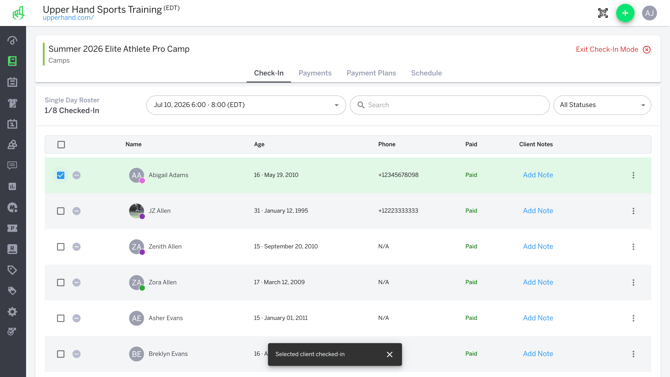
- You can check attendees in one-by-one by clicking the check box next to their name. If they are paid, you'll see their card turn green once checked-in. If they are unpaid, you'll see their card turn red.
- You can check all clients in at the same time by clicking the check box in the header
- Steps to check-in all attendees:
- Click the check box in the header

-
- Check-In All Clients modal will populate asking if you'd like to check in all attendees
- Click Yes to confirm check-in for all attendees
- Steps to check-in all attendees:
- Note - To uncheck all clients, follow the same steps of checking the select all box in the header and click yes in the Uncheck Clients modal
From the Check-In tab you can also:
-
Check Payment Status - Under the Paid column you can see which attendees are paid or unpaid each day of your camp or clinic. This is especially helpful for checking at a glance who you need to collect payment from when they arrive for the event.
-
View Client Notes - Under the Client Notes column you'll see the note icon or the option to Add Note. Clicking on the note icon will populate a view of any profile notes, session notes, or admin notes for attendees. Clicking Add Note will give you the option to add a session note (visible to all clients) or an admin note (visible only to admins).
-
View/Edit Registration Responses - If there are registration fields added to your camp or clinic for attendees to fill out, you will see their responses under the Registration Responses column. You can easily review each client's responses by clicking View Responses. If you need to edit or update any responses you can use the pencil icon in the top right hand corner of the registration fields drawer, edit the response, and save.
-
View, Remove, & Transfer Attendees - You can view the truncated client profile by clicking on the attendee name. This allows you to dig into the client's profile and their history without leaving the page. Additionally, from the 3 dot menu on each listed attendee you have the option to remove a client or transfer a client to a new event just like you can from the Roster tab of the admin event landing page.
Payments Tab Overview
-
From this tab you can see all payments related to the event, view balances, collect payment, and provide refunds when necessary.
Payment Plans Tab Overview
-
From this tab you can see all payment plans including initial plan total, remaining plan total, plan start date, plan end date, and next payment when applicable for each attendee. Like the payments tab, you can view balances, collect payments, and provide refunds.
Schedule Tab Overview
-
The Schedule tab lists all sessions of your camp. You'll see the date, time, location, total number of attendees, total number of attendees checked-in, resources, and staff assigned. Use the 3 dot menu on each session to open the session summary drawer where you can edit session details.