Check Clients In
In this article, learn how to check clients in from the calendar.
APPLIES TO: Admins and Staff
Last updated: October 24, 2023
Let's walk through how to check clients in via the session summary drawer on the calendar.
Check Clients In
- After logging into your account, click Calendar from the navigation panel on the left.
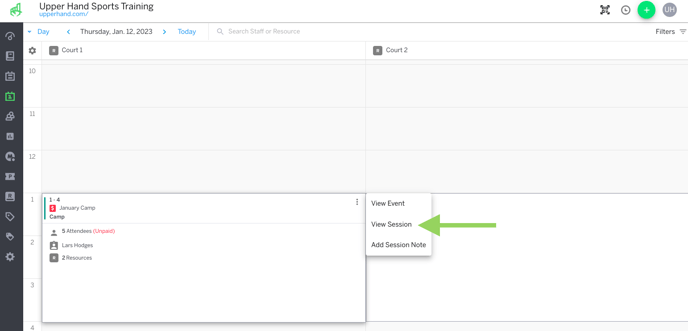
- Hover over the calendar card of the event you want to check clients in for.
- Select the three vertical dots.
- Select View Session.

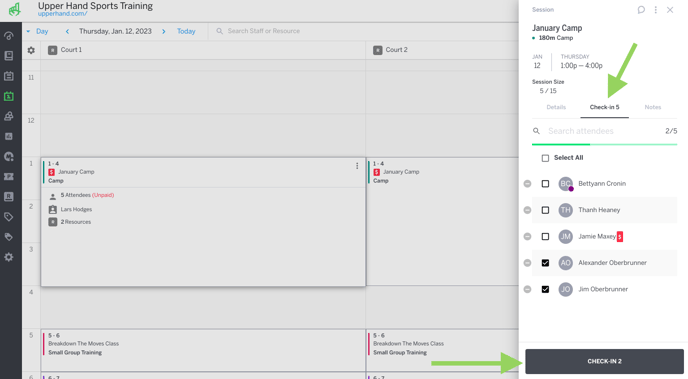
- Navigate to the Check-In tab
- Check the box next to the name(s) of the client(s) of whom you want to check-in.
- Note: The attendee list inside the check-in drawer is listed in alphabetical order by last name. You will also see an unpaid indicator next to their name in the check-in drawer if they are still unpaid for the session.
- Click Check-In.

- Note: If there is only 1 participant on a session you are able to check them in for the session by clicking on the check mark bubble located inside the calendar card without having to navigate to the session summary drawer.