APPLIES TO: Admins
Last updated: July 19, 2023
As an Admin, you have the ability to add and manage your locations as well as designate a specific business availability. The locations added in your account will appear during event creation and allow you to choose which location the event is occurring at. This is helpful if you host training events at multiple locations. The location of the Event will also be listed on your Manage Events page.
Setting your business availability allows you to input days and specific times that you want to disable scheduling in the situation that your facility will be closed or unavailable during a specific period of time.
In order to access these components, you will need log into your account and hover over the main navigation bar on the left hand side and click Settings (gear icon). Then click on the Locations tab.
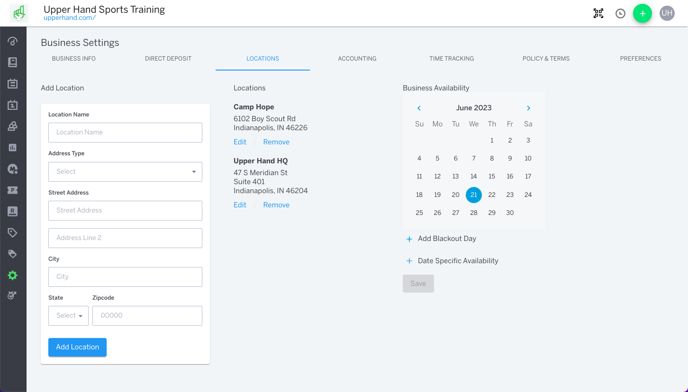
Add Location
To add a location, enter in the appropriate location information underneath where it says Add Location on the left hand side. Note: Address Type is for internal purposes only. Then, click Add Location.
Edit Location
To edit a location, click Edit below to the location you'd like to update, make the appropriate changes, and then click Save.
Remove Location
To remove a location, click Remove below the location you'd like to remove. Note: If this location is tied to an event, the event location will become "TBD". Click Submit.
Business Availability
Under Business Availability you can click + Add Blackout Day to disable scheduling for a specific day, if your facility is closed. For example, if you want to be closed on July 4th, you can add it as a Blackout day and now clients would not be able to schedule themselves for your open booking sessions that day.
You can also input Date Specific Availability to specify certain hours that open booking events can be scheduled that day. For example, if are normally open 10am - 10pm and you wanted to close early at 5pm for a company retreat on June 30th, you can click + Date Specific Availability, select June 30, input the Start Time as 10am and the End Time as 5pm. Now clients will not be able to schedule anything beyond 5pm on June 30th.
Note: If there are already sessions scheduled for that day or time frame, you will have to cancel those sessions before setting a blackout date or changing your date specific availability.
To further your understanding of this feature, be sure to check out the course: 03. Upper Hand Account Setup inside Upper Hand University.