Set Staff Availability
In this article, learn how to set availability for you and your Staff.
APPLIES TO: Admins and Staff
Last Updated: February 9, 2023
Setting your staff's availability is the backbone of making sure your staff is only scheduled for events and sessions they can execute.
How To Set Staff Availability
- After logging in to your Upper Hand account, click on Contacts located in the navigation bar on the left side of the screen.
- Click on the Staff tab.
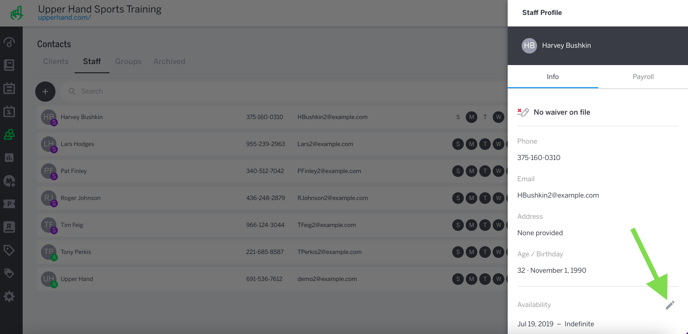
- Click on the name of the staff member whose availability you are wanting to adjust.
- Click the pencil icon located on the right of Availability.

- Choose a Start Date for your availability (if you would like this availability to last indefinitely, make sure the indefinite box is checked. For a limited date, uncheck and choose the end date).
- Click the Days of the Week that you will be available.
- Choose your Available Hours (if you need each day to have a specific start and end time, click the "Day specific" button. You are able to add multiple start and end times to a specific day. This is perfect for giving lunch breaks or having morning and evening trainings).
- To set your availability for a specific date, select Add Date underneath Date Specific Availability. Select the date you want to set availability for. Set the time you are available on that date for.
- Add any Blackout Days by clicking the Add Blackout Days button above the save button (to remove Blackout Days, click the X next to the date).
- When your schedule is set, click the blue Save button.
Things to note
The bubble icons on the Staff page show you which days a specific staff member is available during the current week.