
APPLIES TO: Admins
Last Updated: July 18, 2023
Creating Resources that are tied to a specific space or area in your facility ensures you aren't double booking your clients.
Important Things to Note
- You will need to assign resources to events in order for them to be reserved. Learn how to add resources to fixed schedule events, open booking events and classes.
- Clients will not be able to see your Resources or select a Resource at checkout.
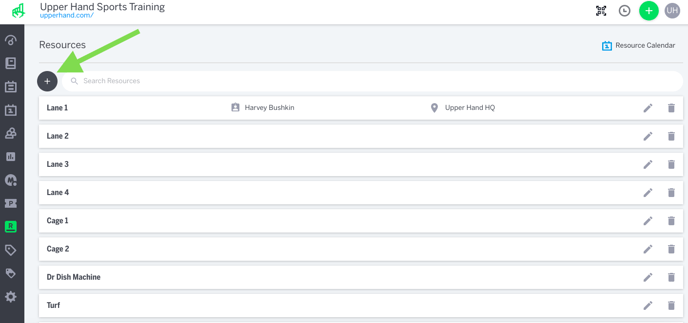
How to Create a Resource
- Log in to your account and click Resources in the navigation panel on the left hand side
- Click on the plus sign located on the top left
- Note: You can also create a resource when adding them to your event
- Give the Resource a name
- By selecting Allow staff preference you can assign a resource to a certain staff. Ex: Coach Jones likes giving lessons in batting Cage #1, you can set that as his preference and if that cage is available the software will assign him in that cage for lessons.
- By selecting Link resource to a location you can tie specific resources to specific locations if you have multiple locations inside of your account.
- You can enter the Square Footage of a specific resource to allow Upper Hand to help track your revenue per square foot.
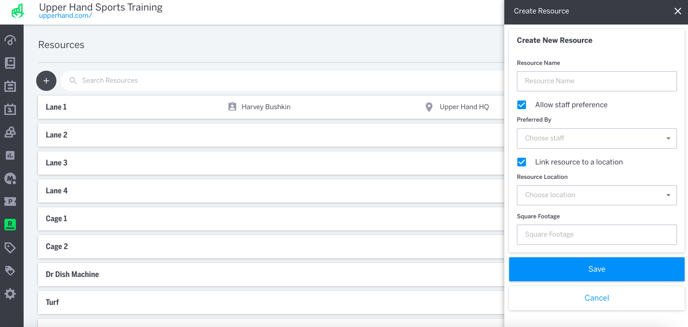
- Select Save